The other day I was going through some older photos in Ligthroom, weeding out some of those that I should never have kept in the first place.
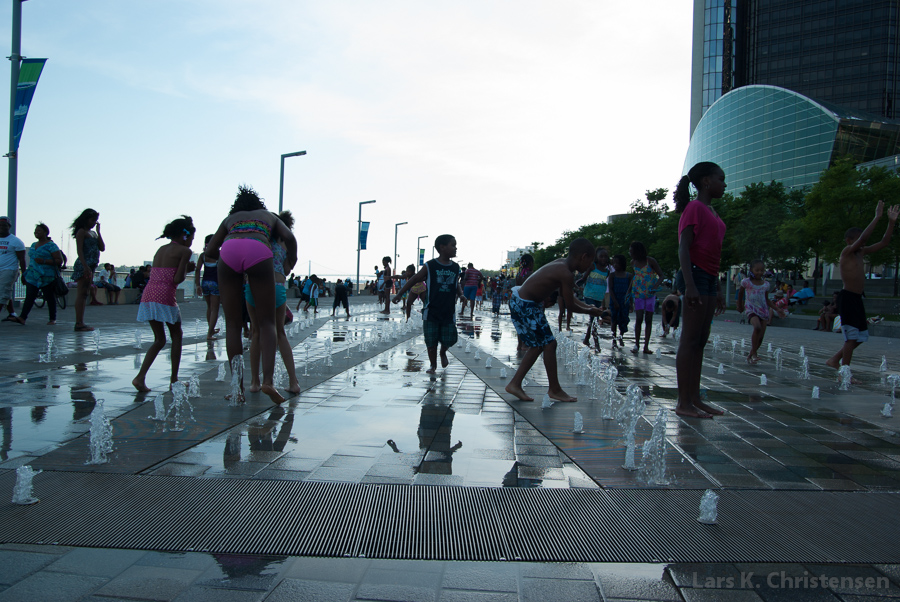
This one for instance. It was taken at the Detroit Riverwalk on an early summers evening two years ago. There was very much contrast to the scene, and the camera has obviously metered for the sky, resulting in severe underexposure of the children playing in the fountain. I should of course have dialled in +1 or 2 EV when I took the picture, but I didn’t.
However, milliseconds before hitting “delete”, it occurred to me that something might be hiding there in the darkness. So I decided to give it a chance, and after adjusting exposure and contrast in Lightroom the picture looked like this:
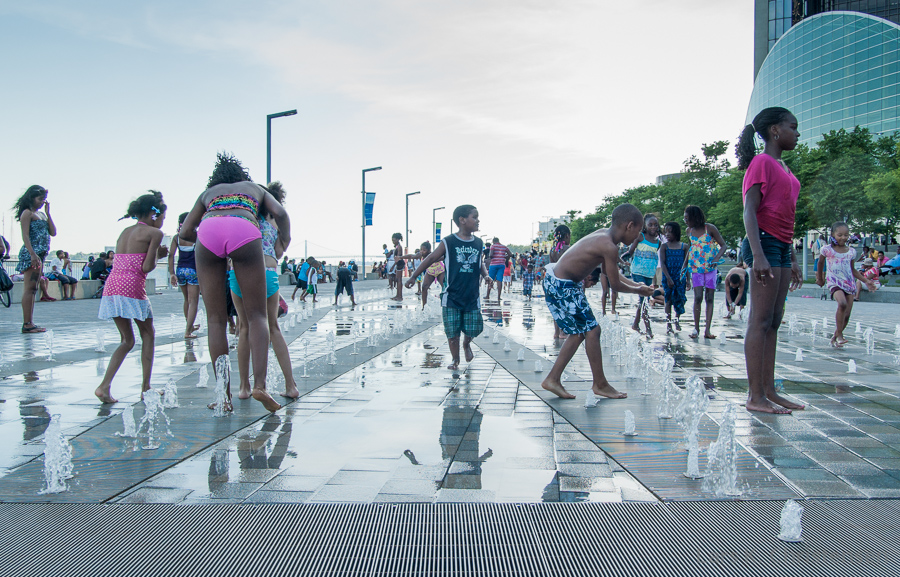
Much better, but still not optimal. The colours are a bit too weird – especially the pink, which attracts attention from the little guy in the middle, which I think is the main character. There is an unfortunate moiré effect in the drain. And there are generally too much going on in the picture.
Cropping was the first thing to do. I could have adjusted the colours and desaturated the pink, but I decided to go monochrome. After tweaking the contrast further, applying a graduated filter to the sky and using a lightening brush on some of the characters, the final image looks like this:

It might not be a masterpiece, but it is definitely useable – contrary to the original. In fact I like it 😉
I seriously doubt that I could have gone away with such intensive editing, if the picture had not been in raw format from the beginning. If you google “raw vs. jpeg” you will get a ton of information, which I’m not going to repeat here. But here are the basics:
Every time I take a picture, the sensor in my camera captures 14 bits of information. In other words: it’s capable of recording 16,384 levels of brightness for red, green and blue respectively, or a total of 4.4 trillion colours. These can all be contained in the raw-file, which are – more or less – the raw data from the sensor, hence the name. A jpeg file is 8 bit per channel only, adding up to “only” 16.7 million colours. That is less than 0.0004% of what the raw-file is potentially capable of.
Now, that’s theory. Who needs 4.4 trillions of colours in real life, you may ask? Probably no one, when it comes to the final picture, at least for on-screen viewing. Most computer screens are 6 or 8 bit, so 16 million colours should be enough. To be honest, I’m not completely sure about the math when it comes to printing. I have just found out that my new printer can handle 16 bit input – but I haven’t figured out the practical implications of that yet.
But the point here is not the final image; it’s the converting and editing. When you edit a digital photo, whether you are adjusting exposure, contrast, saturation or something else, what you are doing is basically changing the brightness level of each of the RGB-channels for each of the pixels in the picture – and the more you edit, the more shifting around of values take place. Popular speaking: the raw-file simply gives you 64 times as much room for moving around, than a jpeg file does. In practical life, you can edit a raw-file much more than a jpeg file, before you begin to see unpleasant effects such as banding or blown out colours.
When you convert the raw-file to jpeg, the levels of each channel for each pixel might be shifted around too, to fit them into the much less amount of colours available. Some subtle nuances, typically in the shadows, might get discarded in that process. If you let your camera do the conversation to jpeg and later decide to try to lighten an underexposed photo and lift out details from the shadows, they might no longer be there for you to work with. Just too bad. That’s why you should do your editing in raw, and not convert (or rather: export) to jpeg before the last minute.
There are other reasons why you should do your editing in raw, such as greater flexibility in handling the white balance, the possibility of loss-less editing (versus a jpeg which degrades due to decompression and recompression every time its opened for editing), etc.
There used to be a myth that working with raw-files was difficult and time-consuming compared to jpeg. That is not my experience. It might be correct if you seldom do any editing at all to your pictures, as raw-files always requires at least a little bit of editing. But editing a raw-files is no more complicated than editing a jpeg file. In fact, in a program like Lightroom or any other, which is optimised for a raw workflow, it is probably easier, since you have more flexibility before things turn ugly, and you have the added benefit of non-destructive editing, giving you the possibility to experiment as much as you like without fear of destroying your original.